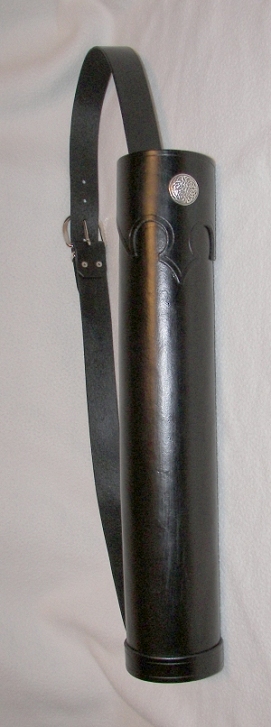
Leather Back Quiver Plans for a back quiver. The black quiver is sewn up the back, while the brown is laced up the front.
- Soak the leather in water 30 minutes.
- Form the leather around a plastic pipe (11" x 20").
- Add a strip of leather around the bottom of the black quiver to cover the nails.
- Glued in a 1" strip of leather around the inside of the quiver
- Rivet the Strap to the bottom of the quiver before you fasten the round wood bottom.
- Glue (any good wood glue) a piece of round leather to the top and bottom of the round wood piece.
This makes the bottom of the quiver look like leather and the leather on top of the wood inside of the quiver cushions the arrows and keeps them from hitting wood. - Finished with standard leather dye, and topped off with wax or an acrylic leather finish.
Click here to See How it is done. www.yeoldegaffers.com
You do not need to glue the leather to the pvc pipe, but you could use some double sided tape (not sure if it will stick to wet leather), what I do is to put some thin cardboard (or very heavy paper), around the leather and then put rubber bands around the cardboard to keep the leather round on the pipe, they do not need to be very tight. DO NOT just put rubber bands around the wet leather, they will actually sink to the leather and leave permanent circles on the leather. Wet leather is like working with clay, even your finger nails will leave marks if you are not careful.
If you are sewing the quiver you won’t need the extra strip, that is only needed if you are lacing it (like the brown one). And you would not wet it, just glue half of it to one side to hold it place till you have laced it.


One side is flat and one side is concave.
It's the base for setting Line 20 & 24 Snaps, and any convex headed rivet back concho..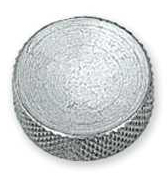
Click on the picture to download the plans for this quiver.