 |
I have never created any custom figures before and actually I have never assembled or painted any of the Elastolin figures.
This is a first for me and relying on the advice of Roland Schaffrin, "The Figure Goblin" and the resources that I have found in books and on the web I make my first attempt at assembly, customization and painting.
|
| INTRODUCTION |
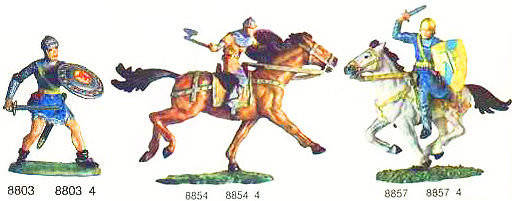
| My goal was to remove the head and the shield from the Prince Valiant figure (8803) and to do the same with the horseman figure (8854). Then use the horseman figure (8854) body with the Prince Valiant head and shield. I also decided to use the horse from figure (8857). *See below. |
 |
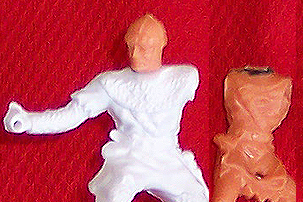  |
Removal
I removed the first head and shield with an X-ACTO knife that I heated up. The removal was very difficult so I purchased a saw to use to remove the other figure's head and shield. The saw gave me a smoother removal but was awkward to use because the blade was too wide for the small areas.Attaching
I used the Ambroid ProWeld glue to attach the head to the figure. I positioned the head so that it was looking to it's right slightly.
I positioned the shield and also attached it with the same glue. |
 |
"Ambroid ProWeld & Squadron Green Putty"
These are the first two products that I used in the re-assemble of the figure.
The "Ambroid ProWeld" worked exactly as they said. It bonded the two pieces together in 10 seconds.The "Squadron Green Putty" also worked exactly as advertised.
- It is a fine grained filler.
- It was ideal for filling seams, sink holes and recontouring.
- It dried hard, had little shrinkage and sanded smooth.
- It was also easy to paint over without primer.
|
|
Filling Holes and Gaps.
To get the shield to properly fit in the new position that I wanted I reshaped the arm on the shield and the shoulder area on the figure with a Dremel Tool.
I then glued the new shield into place on the figure.
Squadron Green Putty was used as the filler which I found easy to use and living up to it's claims. I also used it to fill the gaps in the horse that I had glued together.Other than filling in holes and gaps I will sand smooth any seamlines where 2 pieces went together. |
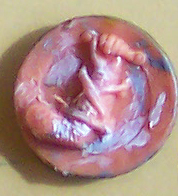 |
This is the shield that was recountoured for the new body. |
| Below are example of how the head and shield were positioned and areas that have the green putty on them as filler that will be sanded smooth when dry.Also note the seamlines that will need sanded. |
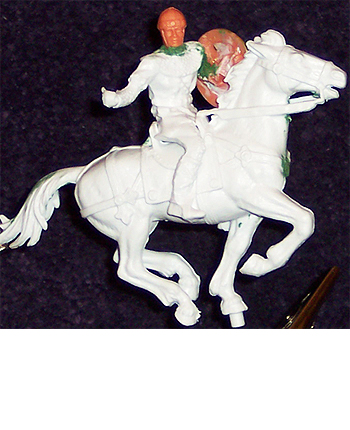 |
- mouseover thumbnails for larger Views -
|
| Painting the Figure There are several areas to paint on the figure. They are Metal, Skin, Cloth, and Leather to name a few.
Painting Aged Metal & Chainmail
 The following are the steps that I took to paint realistic "aged" metal.
1.) Following some very good advice from Roland Schaffrin, "The Figure Goblin", I mixed a small amount of Dark Green with the Neutral Gray till the gray has a very slight green cast to it.
2.) Then I added a very small amount of the Silver Gloss to the mixture.
3.) After painting the piece I used a very small amount of the Silver Gloss to place a highlight on any raised areas.
Metal Parts Colors
MODEL MASTER ACRYLIC
Dark Green
Neutral Gray
TESTORS
Silver Gloss #921575
Gold Gloss #921537
Painting Chainmail
The following are the steps that I took to paint Chainmail.
1.) I painted the chainmail shallow areas with Flat Black watered down to roughly 2 parts paint one part water.
2.) Then I gently wiped the black off of the raised areas with a soft cloth.
3.) After drying I gently drybrushed Neutral Gray on the raised areas.
4.) After drying I drybrushed Silver Gloss as a soft highlight on the raised areas of the chainmail.
Chainmail Colors
MODEL MASTER ACRYLIC
Flat Black #4768
Neutral Gray
TESTORS
Silver Gloss #921575
Painting Realistic Skin (As much as possible)
 The following are the steps that I took to paint realistic skin, as much as possible.
1.) I mixed a small amount of Burnt Sienna with the Flat White till the mixture has a skin tone.
2.) Then I painted the entire face. This I let it dry for only 10 minutes while I did step 3.
3.) To the same mixture I added more of the Flat White till I had the shade about 2 times whiter than the original mixture.
4.) I then immediately applied this as a soft highlight on the raised areas of the face. The bridge of the nose, the cheek bones, and the chin.
This I let it dry for only 10 minutes while I did step 5.
5.) To the same mixture I added more of the Burnt Sienna till I had the shade about 2 times redder than the original mixture.
6.) Then I painted the lips and put a little of this softly under each of the highlighted cheekbones.
Skin Colors
MODEL MASTER ACRYLIC
Flat White #4769
Burnt Sienna #4607
Painting The Eyes and Eyebrows
The following are the steps that I took to paint the eyes and eyebrows.
1.) I had to use a 4x power maginifer to be able to see the datils.
2.) Used the smallest brush i could find.
3.) I am not fully satisifed with results and will try another method next time.
Eyes and Eyebrow Colors
MODEL MASTER ACRYLIC
DK Brown
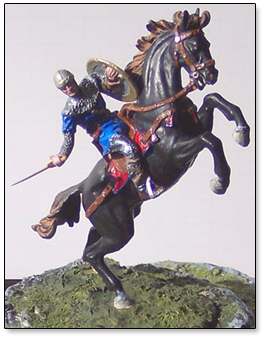
Click Image to see full photo gallery of Custom Val
|
|
